 Once apples have been crushed, they need to be pressed to extract the juice from the mash. As with the apple crusher, I’ve been using Kevin’s apple press for the last couple years, but decided to build my own this fall. I am indebted to him, and to Whizbang Cider for his post on rack-and-cloth pressing.
The essential components of the apple press:
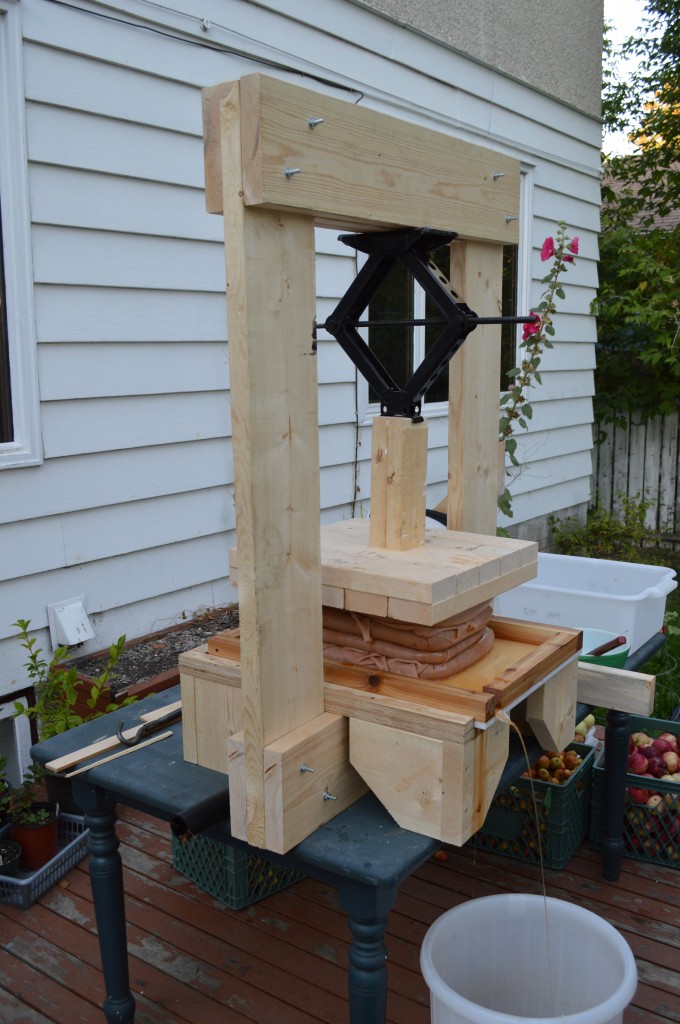
The Press: some kind of geared, ratcheted jack that actually exerts the force that presses the apples. We started out using a scissor jack (pictured below) but have since found that a hydraulic pump jack is more balanced and easier to operate.
The Frame, which sustains the force of the press. The top and bottom beams are made of three 2″ x 8″ spruce boards bolted together. The boards are on their sides for strength.
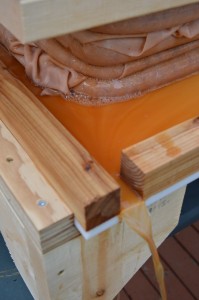
The Tray, which collects the cider once it is pressed from the mash. The base of our tray is a 18″ x 24″ commercial-kitchen cutting board. It’s the right dimensions, it’s food-safe, and it’s affordable. We screwed some spruce doweling soaked in mineral oil around the edges to form a lip to keep the cider in the tray. Liquid flows out a gap in one corner.
Use and Design Details. The apple mash made by the crusher is collected in cloth and formed into juicy blocks called cheeses. I bought a few meters of t-knit cloth from Marshall Discount Fabrics (also a good place to pick up cheesecloth on the cheap…). This material has the strength and stretch to endure pressing. I use a bus tub (the white plastic tub at the back of the photo below) to shape the cheeses. Line the tub with a section of cloth, add apple mash, then fold the four sides of the cloth over the top to make a tidy, rectangular packet of mash. No string is required to fasten the cheese. The cheese is placed in the tray, centred under the top beam of the frame.
We stack three cheeses on top of each other. Be sure to make the cheeses similar dimensions and stack them carefully. The cheeses are separated by pressing plates that maximize extraction. We used cutting boards.
The cheese stack is topped with the main pressing plate that distributes the pressure from the press across the surface of the stack. Our main pressing plate is made of two perpendicular layers of 2″ x 4″s screwed together.
Finally we use some 2″ x 4″s as spacers to span the distance between the main pressing plate and the jack.
The full apple press set-up:
The tray comfortably holds about 3-4 gallons of mash in its stack, which it converts into about 2.5 gallons of cider.
The set-up works quite well, and is affordable: I spent about $150 on the lumber, bolts, and cutting boards. There is some room for improvement. We need to find pressing plates (cutting boards) that are a bit bigger, as right now the edges of cheeses are not under the internal pressing plates, and are not fully extracted. We also need a proper spout on the edge of the tray, as some cider dribbles down the sides.
Special thanks to Eric, one of the cooks at Elm, who helped with the build, and has been climbing into apple trees all over the city to pick fruit.