After this year’s Eat Alberta conference, I had a few people ask me about giving some kind of “advanced” sausage-making class. I wouldn’t consider myself an expert sausagemaker, but at Nomad I got to make them almost every week, so I picked up lots of tricks. I thought I’d compile some of those ideas in this post.
The following are notes on refining ingredients and techniques to better tailor your sausages to your liking.
Ingredients: The Meat and Fat
Every book on sausage-making says pretty much the same thing: use shoulder. Maybe jowl, maybe belly, and maybe a bit of trim from around the carcass, but shoulder is the undisputed sausage-making cut. The reasons are this:
- it generally contains roughly the right ratio of meat to fat
- it is a tough cut, high in connective tissue. This means firstly that it is less suited to quick, dry heat methods of cooking (though that is debatable…) but also that when it is ground and cooked it is especially moist and flavourful
- it is cheap
You won’t go wrong using shoulder in your sausages. However, and this is a big “however”, besides being the best sausage mix, pork shoulder also makes the best pulled pork. It makes the best potted pork. And the best roast, the best ham, and pretty much the best anything, except bacon. If I only buy one side of pork a year, and I want to be able to make pulled pork and terrines and roasts, I can’t afford to grind the whole shoulder for sausages.
With that in mind, I’ve started using leg meat in conjunction with fatback. Leg meat is kind of in between loin and shoulder in many respects: it has more fat marbling through the muscles and more connective tissue than the loin. According the Heston Blumenthal, using leg meat also “boost[s] juiciness because the muscle structure there is better at retaining moisture than other parts of the animal.”[1]
Grinding
I think this was adequately stressed in the Introduction, but I’ll say it again: grinding properly chilled meat with sharp blades is the single most important thing you can do to make a good sausage. Moving on.
Equipment. Increasingly I’ve been using a BakeMax meat grinder. I still think the Kitchen-Aid grinder attachment is a great investment for people starting out in sausage-making, but with the amount of links I make every year, I’ve pretty much destroyed the motor on my mixer. There are clear advantages to having the stand alone grinder, if you can justify the cost.
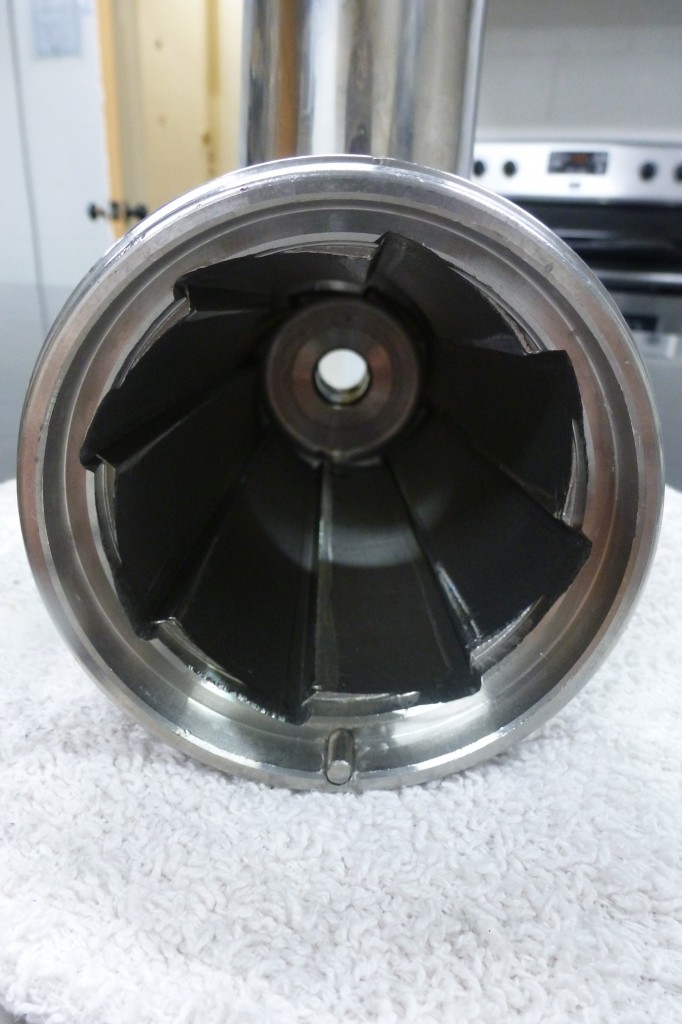
One note on the construction of the grinder housing that took me a few batches to figure out. At the very bottom of the picture below you can see a small pin.
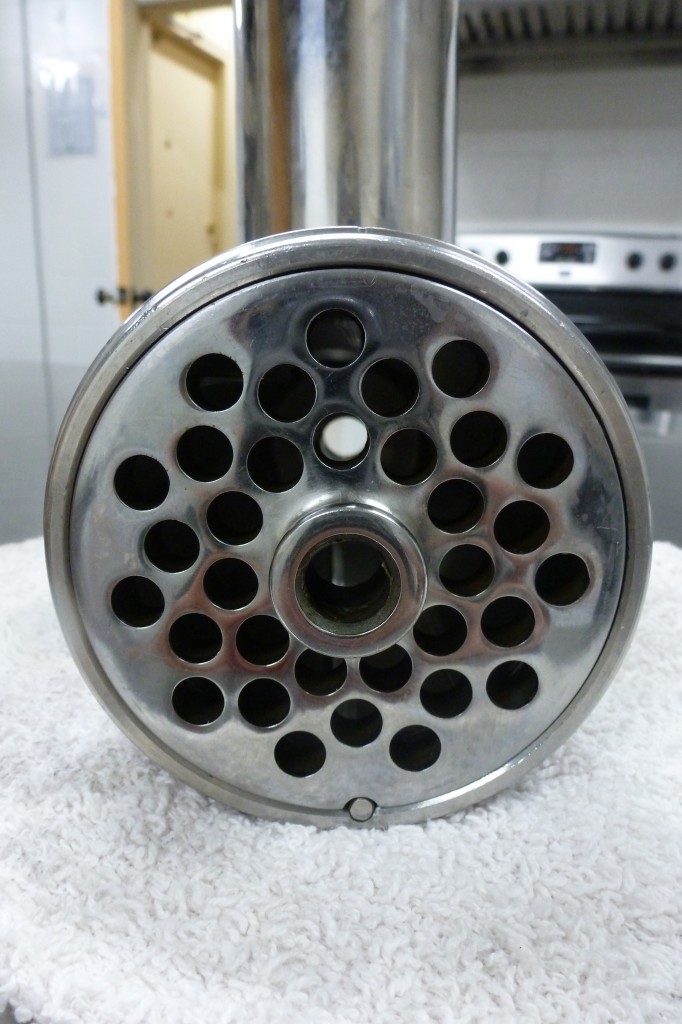
That pin fits into a hole on the grinder plate, holding the plate in place relative to the housing, while the worm and blade turn within.
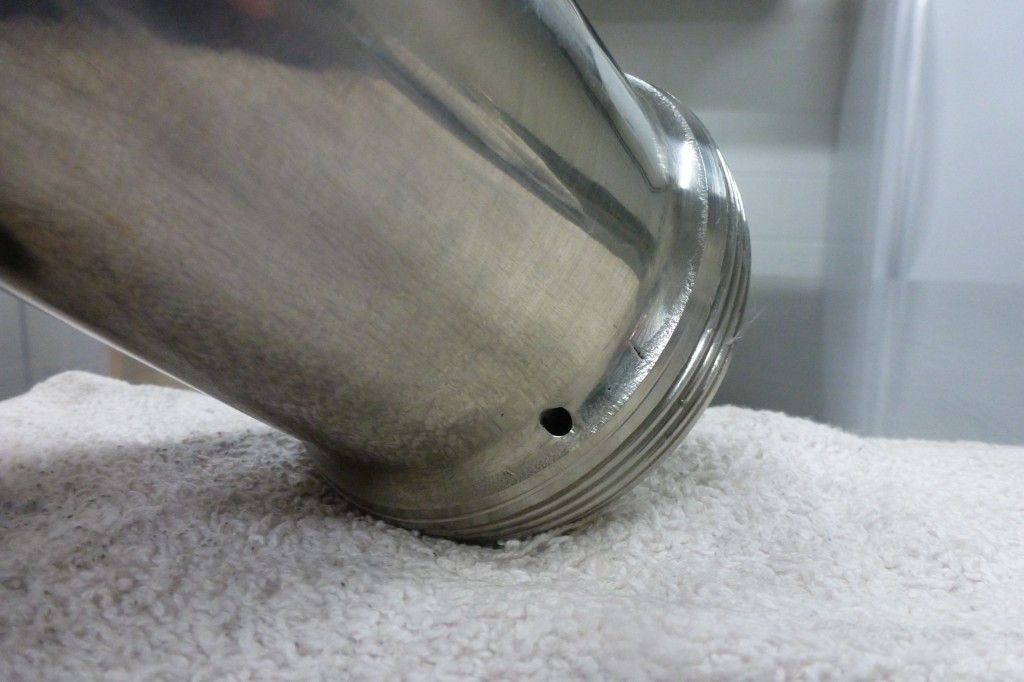
After extensive use that pin might start to slide back. Then the plate will not be held in place, and will turn with the worm and blade. This results is the worst grind I’ve ever seen. It’s very apparent that something is wrong, but it took me ages to figure out how to fix it.
There is a hole on the other side from which the pin will start to poke out. The pin can be hammered back into place.
Ingredients: Seasoning and Flavours
Why I almost always put a bit of curing salt in my sausages:
- improves colour,
- changes flavour,
- I can hang my sausages properly (see below for a full explanation of why I think this is important), and
- I can cold smoke my sausages if I so choose.
For a full explanation of curing salt, see this post.
As for spices: always start with whole spices, and always toast the whole spices briefly before grinding or crushing them. To do this, set a heavy pan over medium-high heat. Add the spices to the dry pan (ie. no oil…). Shake the pan gently so that the spices get even exposure to the heat. Most spices will start to crackle and pop. Once you can plainly smell the aroma of the spice you are toasting, remove it from the pan.
Recipes v. Formulae
I never say to myself, “Today I will make 5 kilos of sausage.” More likely, I cut up a pig, then say, “I’m going to make sausage from this hunk of meat, these hunks of fat, and all these bits of trim.” Then I weight all those items and that’s how much sausage I make. As such I’ve started writing out my sausage recipes in a new format. Instead of a recipe that calls for x kilos of pork and y grams of salt, I use something called a baker’s formula. The weight of meat and fat are allocated 100%, and each of the other ingredients are represented as percentages, by weight of the meat and fat. Here’s and example:
Basic Garlic Sausage
- 100% pork and fat
- 1.640% kosher salt
- 0.150% curing salt
- 0.799% garlic, minced
- 0.225% black pepper
If after meat-cutting I’m left with 4268 g of meat and fat that will become sausages, I’ll need (4268 g x 0.01640) = 70 g of kosher salt.
If you are using the same recipe often, you can easily make an Excel spreadsheet into which you add the quantity of meat and fat, and all the other relative values fill themselves in.
Mixing
In Introduction to Sausage-Making I defined sausages as ground meat, usually stuffed into casings. I say “usually in casing”s to accomodate the various sausages patties, sausages en crepinette, and loose sausages.
Since I go out of my way to include patties in the sausages family, people invariably ask: are hamburgers, then, being ground meat, technically a sausage? The answer is a resolute “no.”
True hamburgers are not mixed, and therefore have a very different mouthfeel than sausages. While the texture of sausages is cohesive and springy, “the gently gathered ground beef in a good hamburger has a delicate quality quite unlike even a tender steak” (Harold McGee in On Food and Cooking). For more discussion on the loose amalgamation that is a proper hamburger, see my post from this past summer: Burger Freak-Out.
(As a sidenote: to my mind Harvey’s “hamburgers” are actually sausages, because they have clearly been mixed, and have a firm, springy texture!)
Now that we are intermediate sausage-makers I must make our definition of sausages more precise. Sausages are ground meat that has been mixed to develop a cohesive texture, then usually stuffed into casings.
Stuffing
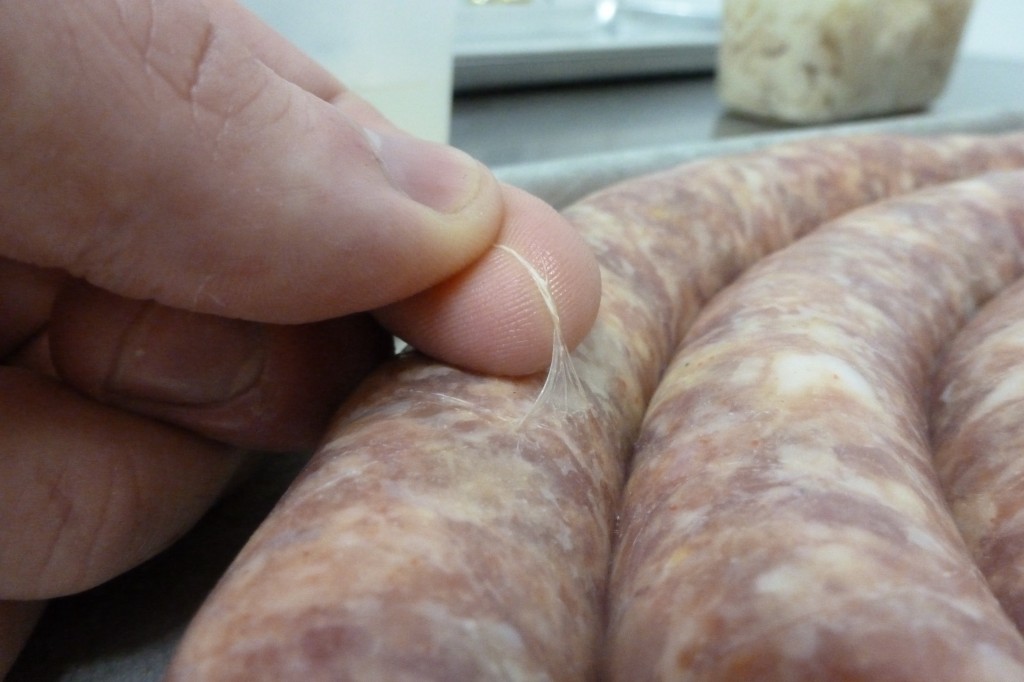
Natural casings are actually only one of several coaxial layers that make up the pig’s small intestine. It’s called the submucosa. It is surrounded by networks of blood vessels and nerves and all kinds of other stuff.
Every so often I’ll be stuffing forcemeat into natural casings and I’ll notice that the surfaces are absolutely covered in tiny ganglia. I use the term as a descriptor, not an anatomical sense.
To me these are a imperfections. Entirely aesthetic, but imperfections nonetheless.
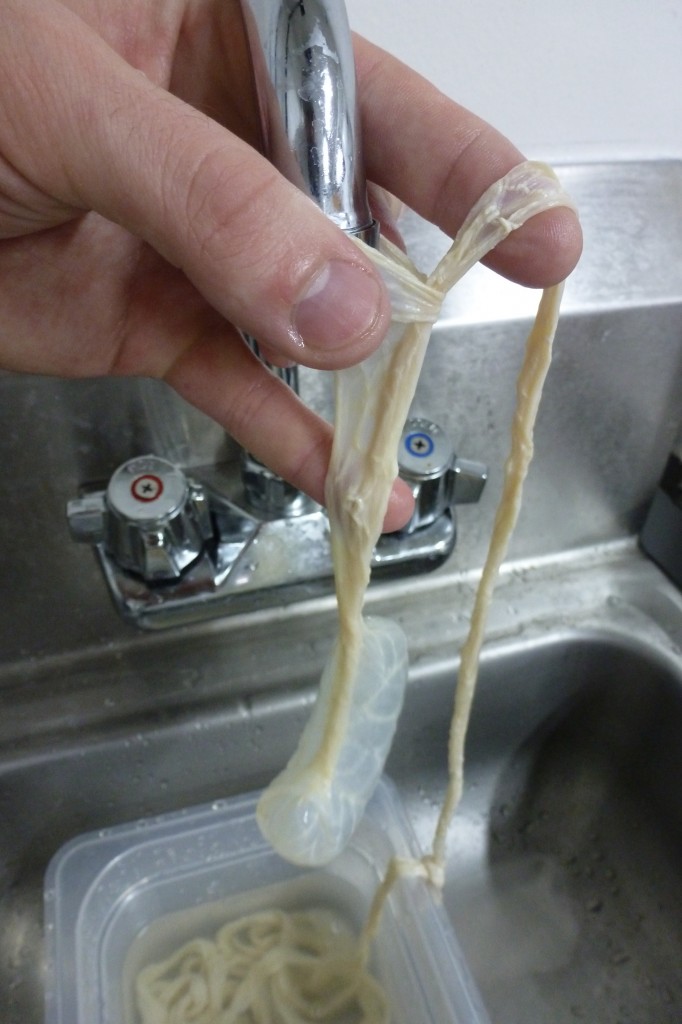
You can pick them off, though that would be tedious. As further evidence that God wants us to make sausages, you can easily turn casings inside out so that these unsightly ganglia are on the inside, next to the meat.
Simply turn one end of the length of casing inside out, then feed it onto a faucet. Start running cold water, and the weight of the water will actually pull the casing through itself. That isn’t a great explanation. Hopefully the picture below offers some clarification.
As a final note on casings…. For the past couple years I’ve been buying natural hog casings from Halford’s here in Edmonton. I’ve been noticing huge variations in the quality of the casings within a hank.
Linking
I’m often asked if you need to somehow seal the ends of the sausages after linking to keep the meat from shooting out. The answer is “no,” provided you have mixed your meat properly to obtain a good bind, and provided you cook the sausage gently (see below for more on cooking).
Hanging
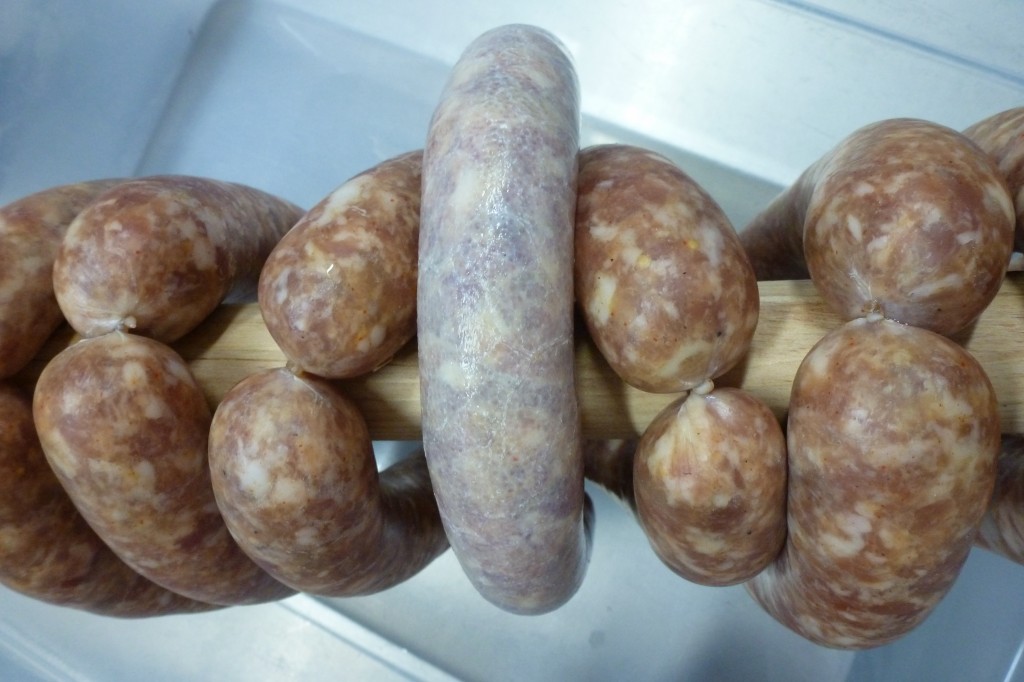
After stuffing and linking my sausages I hang them at room temperature for a couple hours. I can do this safely because they contain curing salt. The reasons for hanging sausages are numerous and compelling!
- Hanging compacts the meat and makes for a more cohesive texture.
- Hanging reinforces the links you’ve made.
- Hanging the sausages at warmish temperatures helps with flavour maturation. This is a classic technique of European charcutiers.
- Hanging dries out the surface of the sausages, which has three pleasant effects: one, the sausages freeze without forming ice on their surfaces; two, the sausages brown better in the pan; and three, the colour of the sausages becomes darker and much, much more appetizing.
That last point sounds crazy when I say it aloud, so I took a picture of a freshly stuffed sausage (pale and slippery) beside some hanging sausages (darker, redder…) Which would you rather put in your mouth?
Cooking
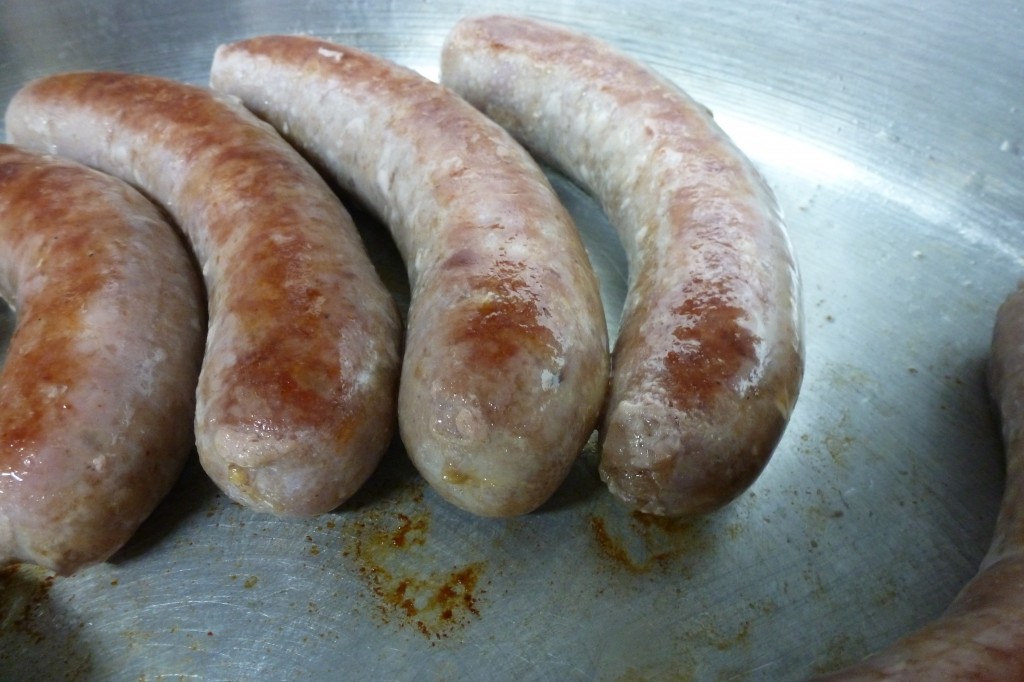
Use gentle heat! Do not score for the love of God! Do not overcook! A gentle pan is good, but I prefer poaching the sausages, shocking in ice water, then gently reheating in a pan or on a grill. This cooks them much more evenly and much more gently.
As mentioned above, if you mix, stuff, link, hang, and cook properly, the meat will not shoot out the ends of the casing. See below:
References
1. Blumenthal, Heston. In Search of Perfection. ©2006 Heston Blumenthal. Published by Bloomsbury USA, New York. Page 126.
